Travelling and Living with Ortlieb Panniers, there’s no doubt that Ortlieb panniers are right up there when it comes to quality and popularity as a choice of panniers for the touring cyclist. Although travelling and living with Ortlieb Panniers can at times be less trouble free as one would like.
Don’t get me wrong I like my Ortliebs and rate them highly, but at times things have not always gone to plan, not necessarily the Ortliebs fault each time.
My panniers and luggage did not come with much in the way of fitting instructions, and I believe nor do any others (correct me if I am wrong). This can lead to some confusion during both installation and with their use. During my travels several times people have said to me “oh, I wondered what that was for”, “I didn’t realise you could put them on like that” or “so that’s how you are supposed to close them”.
Correct Fitting
When installing them you’d think it would be very easy, as I said mine came with very few instructions so I set them up as best as I could and then along the way learnt to set them up a little better or at least in a way that worked better for me.
- The Top Hooks should be spaced as far apart as you can to spread the load.
- The bottom Hook should be fully located to avoid lateral movement when installed.
- Spacers should be used at the top hooking points to fit your gauge of pannier (see later for alternative fitting).
- Clip on carrying handles don’t help with waterproofing, put them inside (I sent mine home)
Spares to carry while travelling
- Spare Bolts and Nuts (Plastic), on a long tour they can come undone, check regularly.
- Patching Kit
- Glue (Super Glue, or a rubber based glue – puncture repair glue doesn’t work)
- Old parts of inner tube, can be used with glue to protect over the top of a patch.
Problems on the Road
I had some problems on the road, less than 800 miles into the trip on my ride, cycling to Africa I had got as far as Spain and some of the bolts fell out of one of the rear panniers. Happily cycling along when Normski a German fellow I met along the pointed out my bag was hanging off at a funny angle. Luckily all the bolts were still there and the plastic nut was inside the bag. This same nut and bolt continued to be a problem throughout the trip and the same problem arose with one of the front Panniers. REGULARLY CHECK & TIGHTEN ALL BOLTS while on Tour. CARRY SPARES so if you do lose some, you can replace them. I didn’t try it but did think of maybe applying some glue to the inside of the nut before tightening them.
Throw away your Spacers!
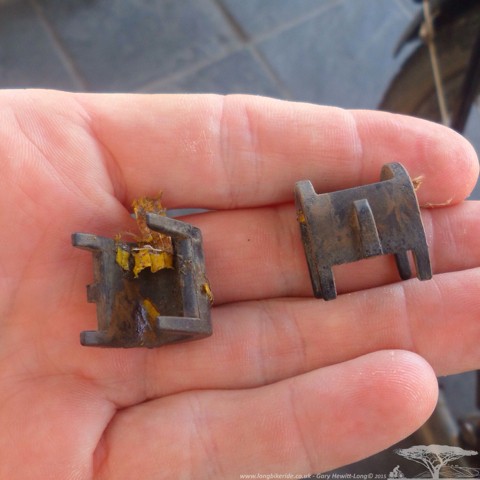
I have yet to meet a cyclist who has toured for any amount of time that doesn’t complain about the spacers used on the hooking system.
Over time the hooks slowly widen a little and whilst removing bags from the racks the spacers have a tendency to fall out, when they do this requires some level of practice and skill to put the luggage back on whilst opening the hooks and retaining the spacers and after a while it gets tedious. I met several people on the road that had lost their spacers altogether.
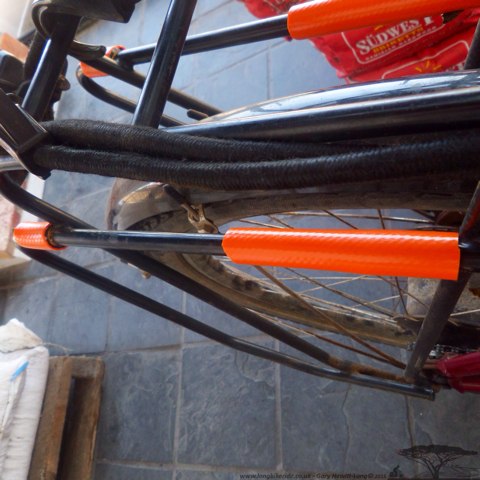
There is a simple solution to this problem, throw them away! Instead of using the spacers provided, procure some gas hose or similar, cut to length and then cable tie these to your bike rack.
Not only will the retro fitting of the hose mean you no longer have problems with the spacers falling out or possibly being lost on tour, but the hose will also protect your racks from wear, especially important if your racks are made of Aluminium as excessive wear will cause wakening of the structure.
And you can do the same with the front racks as well. With my way of loading the rear bags tend to be much heavier, the falling out hook syndrome didn’t arise on the front bags, it made sense to tube the racks up both front and back at the same time.
I must give credit to for this idea or at least relaying it to me by Wouter Cocquyt a fellow cyclist I met while travelling through West Africa. Wouter had modified his racks when I met him and I meant to do mine as soon as possible, but you know how things are sometimes, I just made do until I got as far as South Africa and stayed with Kim and Bennie at their Hardware store, they had gas hose!
Carry Glue!
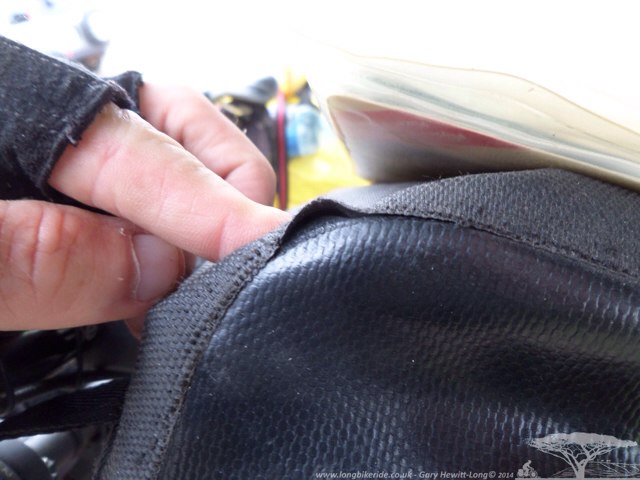
Ortlieb luggage is heat sealed, not stitched. This is excellent, it joins the material whilst retaining waterproofing. I found in this respect my panniers were flawless. However my bar bag with its constant opening and closing did not hold up so wells, the heat seals started to come apart.
Ortlieb customer services were fantastic when I contacted them while on the road but when asking them how to temporarily fix them, what glue should I use? They couldn’t help, explaining they would be heat sealed. However I found a cheap UHU general purpose glue that worked on rubber and plastics and this worked out fine. Over a long period and use it did come undone again but didn’t take long to clean up and re-glue. The solution worked well and stopped the materials coming apart further. I’d now carry this glue in my spares kit all the time. Carrying Patch material and using some old inner tube, the same glue works well to patch holes on your luggage.
If anyone else has some good luggage tips, let me know..

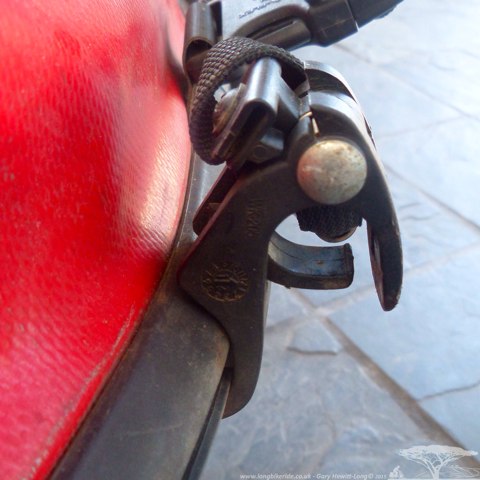
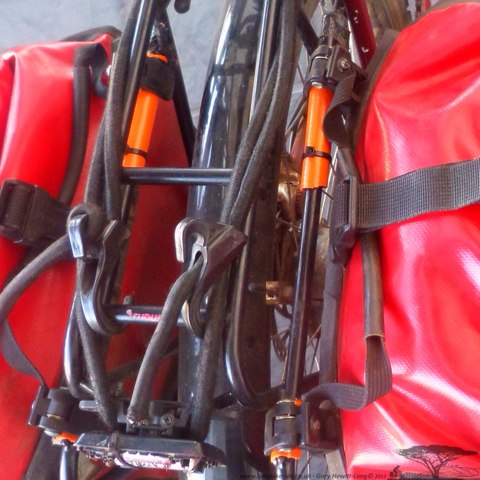
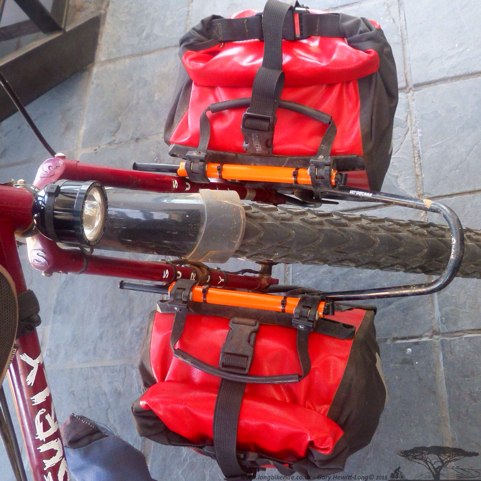


I have never encountered any theft while touring aside from a reflector strap I was using a a brake lever holder. But one trick I have learned with Ortliebs is to buy a spare set of clips and webbing. Cut the webbing (handle) in the middle of a set and put a 3rd mounting clip in the middle of each pannier. This stops the mounting rail from bending and also functions as a thief confuser. The third clips tail (webbing) can be tucked between the pannier and rack and will make it really difficult to quickly lift off your pannier if you don’t know whats going on.
I’m one of those you’re yet to made bad experiences with his Ortlieb panniers. Never lost a spacer or had trouble with them. Also never had a delaminaition issue.
I also wouldn’t advise for carrying too much spares “just in case” something breaks or get’s lost. In the end it all boils down to your ability to improvise, and, should stuff break or get lost, it’s always the stuff one doesn’t carry spares for…
Also, I’d opt for carry the “more multi-pupose” kit, such as duct tape, zip ties and glue, but only a limited amount as most stuff can easily picked up en route in the next bigger town.
Of course, one should take precautions when doing some really remote stuff, but most cycle tourists are never further away from civilization than half a day’s busride…
So: take it easy and enjoy the ride! 🙂
I agree with your comment Andy.
I sent home a lot of the spares I was carrying and needed to fix items I hadn’t thought would break. It’s funny how one persons experiences of problems can vastly differ from others. I met several people who had punctures with their sleeping mats from the off, whilst I never had one! The Glue I carried fixed more than just panniers, I also carried tape and zip ties.
12.000km all over spain, off road, on road, same Ortlieb bags, same spacers, all spacers still there where they belong.
best S.
Delamination of the bar bag: had the same problem over here, glued it with 2 components epoxy glue (bisonite). Just did it a month ago, so I don’t know the results on the long run (yet).
Plastic bolts getting loose: same over here. (just one till now). Tightened it again. If they get loose again, I’ll glue them with bisonite too I think. Fixing holes : I use the ortlieb patches, because duck tape comes off after a while.
Inserts: I use black rubber hoses on my wife’s bike, she’d lost the inserts A warmshower guest gave the advise to wrap a slice of an inner tube around the tubus racks, might do the trick too. Or glue the inserts…
Funny that a slice of inner tube is mentioned as that is what i used to fill the space on a tubus rack.
The tubus racks are not a match made in heaven for the ortliebs. You have a choice of 11 mm or an 8 mm adapter. The 8 mil needs to be used on a tubus rack but that still leaves a gap. A gap which i filled with a slice of inner tube wrapped once around the rack and held in place with some electrical tape.
Just tried gas hose on my new Surly rack fitted on the front and now my rear Ortliebs fit perfectly and snugly on the front. No more rattling around. Great tip. Lost the inserts long ago. The gas hose I already had was free, inserts £3.99 a pair. In future the inserts will go straight in the bin, or on ebay 🙂